Before we can begin creating a game, we will need to set up the environment to make it. This post will go over how I set up Unity for my game, Pizza Run. If you haven’t been following along with my previous posts, you can read its overview here. Note that I am working on iOS, so instructions may vary for Windows.
Installations
I’ve already set up my tools in the past, but here they are for reference. Since this is more of a log than a tutorial, I will not be showing you how I installed everything.
- Unity Hub: Installed the latest version
- Unity 2021.3.18.f1 – The most recent recommended version with LTS (long term support) as of the time of this writing.
- Make sure to include the optional WebGL support and Documentation installations.
- Unity 2021.3.18.f1 – The most recent recommended version with LTS (long term support) as of the time of this writing.
- GitHub Desktop: Version-control program for git. While not necessary as you can do everything via console, I highly recommend using a user-friendly GUI. It will make your life easier.
Set Up Git Repository
Assuming you’ve already created a GitHub account and signed in, let’s move on to the next step. In GitHub Desktop, go to File > New Repository… This will open the following window. I’ve filled it out as below.

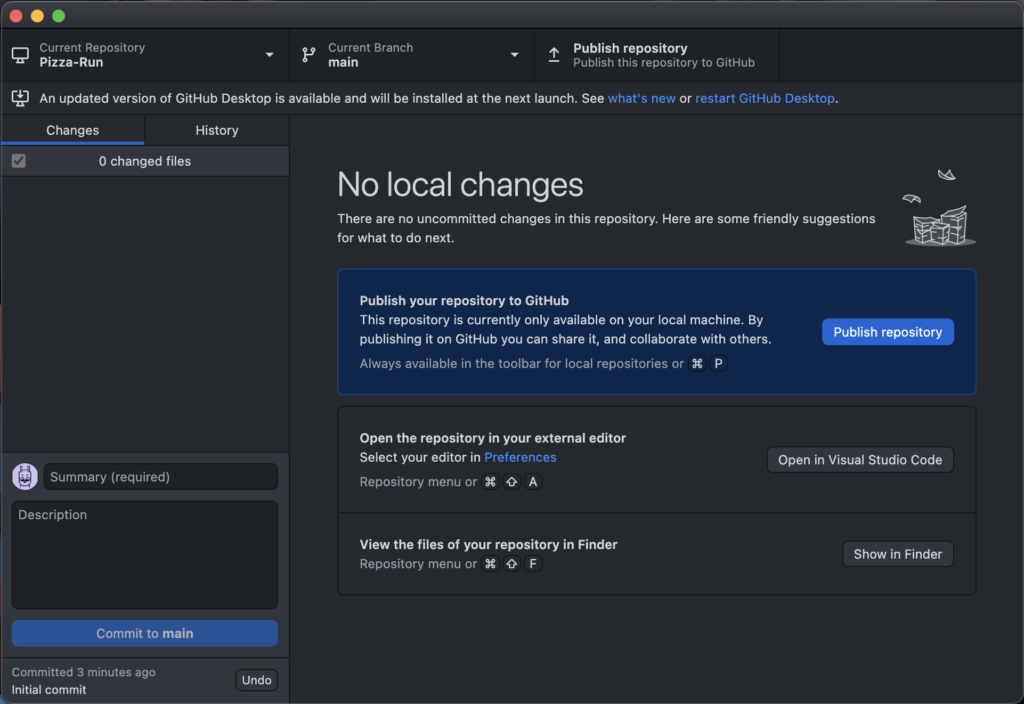
Now currently, this repo only exists in your local. Make sure to press the big blue button that says “Publish Repository” below to push it onto your GitHub account. Note that you can also press the button on the top row there, next to the current branch.

Create the Unity Project
Let’s create the Unity project for Pizza Run.
- In Unity Hub, press on New project.
- I picked the 2D template and named the project “Pizza-Run”.
- As for location, you can choose your repository folder that you created; however, this will create a folder within a folder. If you open your gitIgnore file, you’ll see a line that says:
This .gitignore file should be placed at the root of your Unity project directory. Thus, we will need to move the folders and files to the correct location. - Since the gitIgnore we added only acts on the same level folders/files, we’ll want to move the files within the newly created folder into the root of the Pizza-Run repository and delete the old folder. You can also just edit the gitIgnore file itself, but this is easier.
- For reference, if your Assets folder existed in /GitHub/Pizza-Run/Pizza-Run/Assets, it should now be located in /GitHub/Pizza-Run/Assets.
Tips
- You can open the file location of your git repository in GitHub Desktop by right-clicking on Current Repository and choosing Reveal in Finder.

- Likewise, you can open the project location of your Unity project in Unity Hub by doing the same.

- If you want to view or edit the gitIgnore file, press CMD + Shift + . (on Mac) to reveal hidden files, right-click on .gitIgnore, and open it with your text editor of choice.

Commit & Push
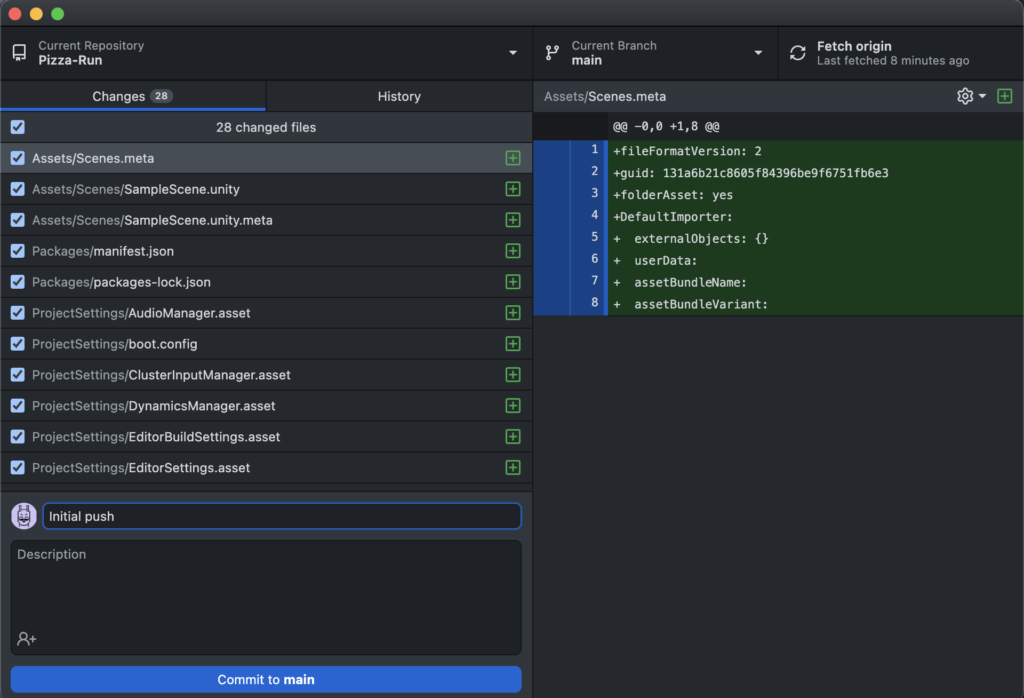
Go ahead and commit your files to the branch by pressing the blue Commit button below.
Note: If you see a few thousand files staged under Changes, your Unity files may be in the wrong place and your gitIgnore isn’t acting on it. Make sure you fix that before continuing.

Once committed, feel free to push your changes by pressing either the big blue “Push origin” button or the one on the top-right corner.

Unity Settings
Since we moved the location of the Unity project one folder up, we’ll probably need to reopen the project with the correct path by selecting Open in Unity Hub and selecting the correct folder.
Once done, there are several changes I like to make before getting started, so that I don’t need to worry about them later. Open up your project and let’s get started.
Change the Resolution
The first thing I like to do is change the resolution of the camera. To keep things simple, I’m going to lock the game to one size. I’m going to use 960 x 600 px.
- Under the Game tab, you can add a new resolution, or use one of the existing ones.

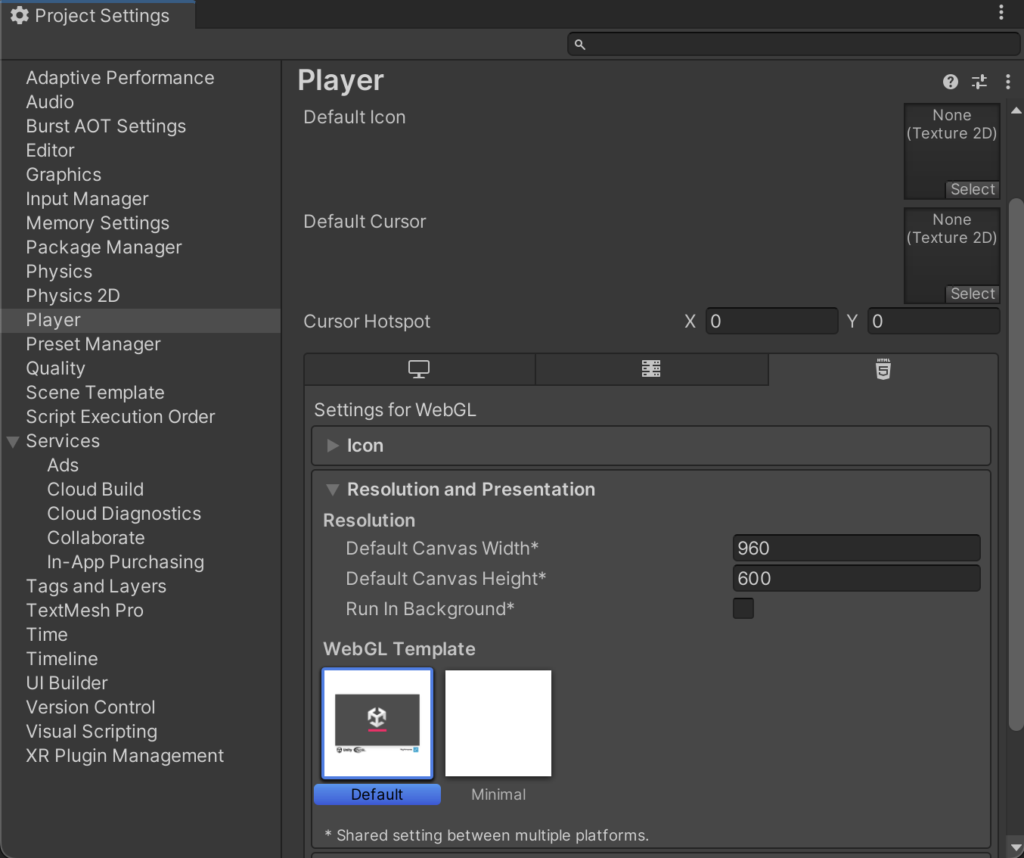
- Go to Edit > Project Settings > Player. Make sure you click on the tab under “Cursor Hotspot” with the HTML 5 icon to make changes to your WebGL settings. Under Resolution and Presentation, you can change the canvas width and height to the desired size. Mine is already at 960 x 600. (Note: You can also change your “Company Name” and “Product Name” here, which I like to do as well.)

Change the Publishing Settings
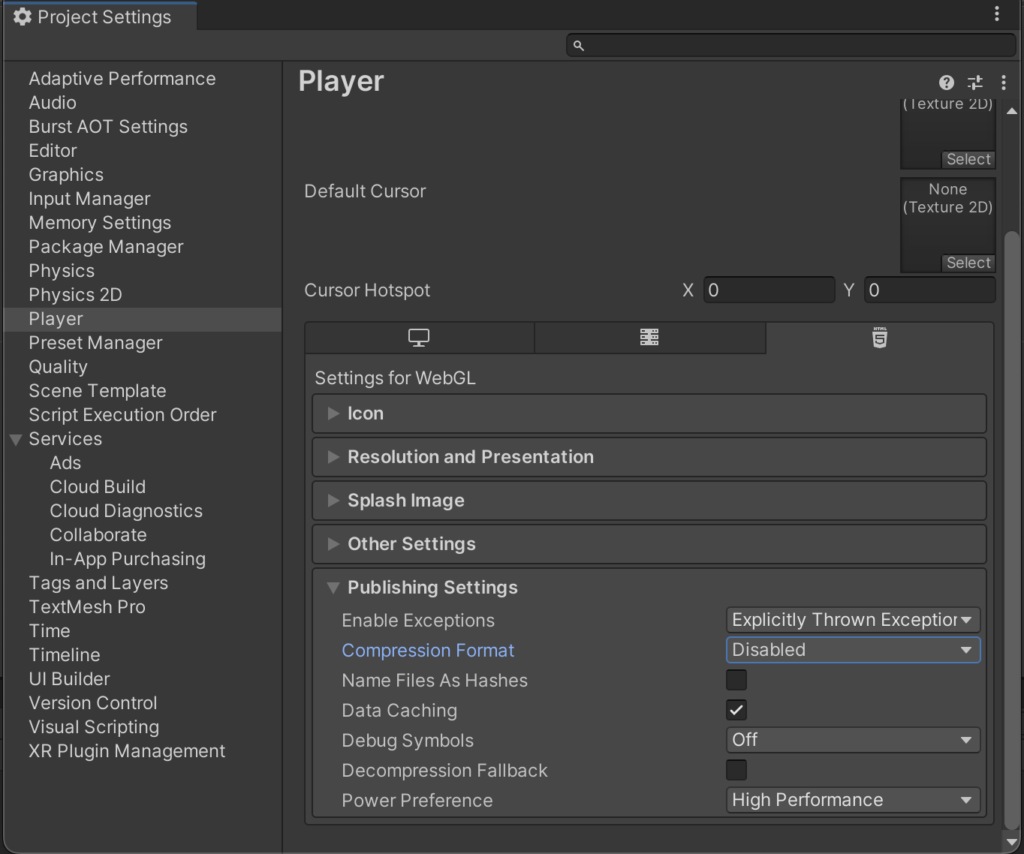
This part is important because your game may not run properly on the browser if you don’t change this. Assuming you’re still on the Project Settings window, scroll down to Publishing Settings and make sure the Compression Format setting is set to “Disabled”.

You’re All Set!
Now that the boring part’s done, we’re now ready to move on to building the prototype!